Tuesday, July 7, 2015

Number Sequence Puzzles

I've seen a ton of number sequence puzzles lately, but they all seemed to count from 1 to 10.  I wanted to be able to differentiate, so I decided to make my own puzzles! I made my puzzles so youngsters can practice counting by 1's, 2's, 5's, and even 10's.  I had so much fun with this, I plan on making a lot more of these in my future (and perhaps even some alphabet ones, too!)!!  Keep reading to see some of the puzzles I made and to grab the freebie!!

I'm excited about my Cool Cat set!  I'll be doing a lot with Pete the Cat the first week of school, so these will be perfect!  If you want to check out my Cool Cat set, click here.


 I also love seasons, so of course I had to make a set of puzzles that included the four seasons.  How cute is that worm?!  If you want to check out my seasons set, click here.


 And finally, perhaps a trip to grandmother's house through the woods? Click here and you'll be brought over to TeachersPayTeachers and can download it for free.


Happy sequencing!

Sunday, July 5, 2015

Counting Fun with Spinners

As I'm waiting for everything to arrive in my classroom, I've been spending a lot of time on my computer.  Here's my latest project.  Be sure you don't miss the freebie below!!


This activity provides practice counting up to 5, 10, or 20.  Each background has three different pages. The first page has a spinner with the numbers 1-5 and one ten frame. The second page has a spinner with the numbers 1-10 and one ten frame. The third page has a spinner with ten numbers from 1-20 and two ten frames. 
 

 Here are just a few of the other ones I made.
 

And of course, what type of blogger would I be if I didn't have a freebie for you??  This one was inspired by the mini erasers many of my teacher friends have found at Target over the last week or so.  I'm a really jealous happy that so many of them have found these cute erasers, that I made this little caterpillar set for them.  Click here and you'll be brought over to TeachersPayTeachers and can download it for free.
 
 
And if you'd like to check out my other sets, click on the links below the images.


Happy counting, friends!!


Long time, no see....

It seems like every year I have to post something like this...."Sorry I haven't posted in a long time, I'm the worst blogger, blah, blah, blah..."  Well, once again, it's true!  Hopefully my posts, even though they are few and far between are helping someone, somewhere in their classroom!!  And maybe this will be the year that I figure out how to blog on a regular basis AND teach fulltime!  This year I'll be moving from fifth grade down to PreK, so I'll definitely have a ton to blog about!

Here's my classroom being built...I know it looks super big, and it is.  However, technically this is two rooms with a accordion divider between the two rooms.  That said, the other half of the room isn't used because these two rooms are our school's safe rooms and we have to have room for all the kiddos.  Therefore, I'm using all of the cabinets in the other side of the room, plus we'll be napping on that side (and the cubbies for mat storage will be there, too).  We'll also be using it for whole group activities that need more space than our rug in our classroom will accommodate.  I'll also be putting a group table, for small group work, in the middle where the two rooms are divided.

 
This is part of my storage room.  It's HUGE, yet I know I'm going to run out of room just the same!
 
These are two of the things I'm having built for the classroom.  The cubbies/lockers will go in the vestibule right outside of our classroom.  And the loft will go in one of the corners.  The loft is 12' by 5' and it is amazing!  The stairs hadn't been installed yet, but they go on the far left of the loft.  The top of the loft is our reading center.  It's got a kid size bookshelf, sofa, chair, end table, coffee table, and 3 bean bags in it.  The downstairs is our dramatic play area.  It'll have a kitchen, baby doll furniture, table and chairs, etc.  Eventually I'd like to add another kid size living room set down there.

 
This is the only thing I've really done so far, and I really only did it to test adhesives.  None of my furniture is in yet, so I'm patiently waiting for everything to arrive so I can set it up.  The chairs and laminator won't stay here (the laminator WILL be on the other side of the room on the counter though.  I want quick and easy access to it at ALL times!! Haha!) The empty cabinet door is going to be for our Color of the Week Scavenger Hunt.  Our entire school celebrates a color of the week through mid-November, so after that I'll reassess and decide what's going up there!

 
As I set up the room, I'll be sure to post additional pictures, along with what I'm including in each center, etc.
 
Thanks for reading!

Monday, October 20, 2014

Halloween Treats

I use these treat bags frequently for different things...for my own children's teachers, for my own children's classmates, my students, my co-workers, my husband's employees...just about anyone!  I love them because you can vary the size of the bag, just by stapling them lower or higher!  Here's how to make them:

The first trick is to get bags that can close.  I actually get mine in the jewelry department at our local craft shop.  My favorite size are 3" X 4", but any size will work.  I think I pay about $3.50 for 100 bags.  (Ignore the fact that these are Thanksgiving treats, it's what I had pictures of!)
 
 I simply staple my bag topper on the opposite end of the zipper closure.  By doing this I can get them all ready to go ahead of time and then just fill them a day or two before I want to hand them out.

In the two pictures above you can see how by changing where I staple them I can make the filling area bigger or smaller....(in case it's hard to tell - the first one is smaller, the second one is almost twice as big...same exact size bag!).

Here are the Halloween ones...just print, write your name, fold, staple, and you're ready to go!
 
Click here for this fun FREEBIE!!  It includes regular pictures, and a few owl ones because my daughter's teacher's classroom theme last year was owls so that's what she wanted hers to be!

Saturday, August 2, 2014

Schedule Cards Owl Theme

One of my teacher friends saw my camping schedule cards and wanted some owl ones.  So alas, I went to work making owl cards for her.  Her cards were customized for the headings she wanted and a slightly different color scheme, so I had to tweak these a bit.  However, they came out pretty cute, if I do say so myself!  I used 8 different backgrounds and there are 56 cards in all.  I wouldn't expect anyone to use them all.  I mean, after all, who does Language Arts, English, and Grammar?!  Surely they call it one thing and then call it a day.  But since I know different people call the same thing by different names, I included a variety of choices.


To purchase these check out my TeachersPayTeachers store!

Tuesday, July 29, 2014

Schedule Cards Camping Theme

Yippee!  One more thing crossed off my list of things to do for the first day of school....my new schedule cards for this year's theme! I used 3 different backgrounds (camouflage, stripes, and stars).  I've got 52 cards in all.  I don't use all of them by any means, but I wanted to put them in my TPT store so I tried to add extra ones that I thought other teachers might like.  I hope you like them!
 
I'm very excited about how great these are going to look up on my assignment board!  To purchase these check out my TeachersPayTeachers store!


Thursday, July 24, 2014

Mini Chart Stand

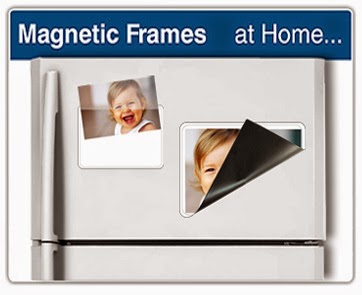
How many anchor charts do you have hanging on walls, on chart stands, or rolled up somewhere in your classroom?  Well, if you're anything like me the number is high!  Last year I made smaller versions of my charts by either redoing the anchor chart on my computer (or sometimes by hand) or taking pictures of the original chart.  Then I'd shrink it down a bit, print it, and put it in 8 X 10 magnetic picture frames I had that looked something like this...


That worked out ok, but they were a little time consuming to slide in the frames, I only had so many frames, and I was limited on  how many magnetic surfaces I had to put them on.  Not to mention, students weren't very independent using them because they weren't really set up for that. 

 
Like many of you, I find Pinterest is my best friend!  While wasting time on perusing Pinterest, I came across several little mini chart stands.  I made a few design changes, and thought I my husband can make those!  So this summer my husband cut some PVC pipe for me, and I made a bunch of mini chart stands, one of which has already been hijacked by one of my teacher friends for her classroom! The stand holds 8 1/2 by 11" paper horizontally or vertically.  I use a 3 hole paper punch to be sure that the holes are the same distance apart on all charts.
 
I plan on having more than one chart stand around the room that my students can use.  I'm thinking at least one for science, math, English, and reading.  I am thinking of painting them (or using washi tape) to coordinate with the colors we use for each subject so they can easily remember which stand to go and look at when they have a question!
 
If you want to purchase one of these for yourself, you can visit my TPT store by clicking here.


Or if you want to make one on your own...I used:
5 - 12" long
4 - 3" long
6 - elbows
2 - tees